How to Build a Deck Railing
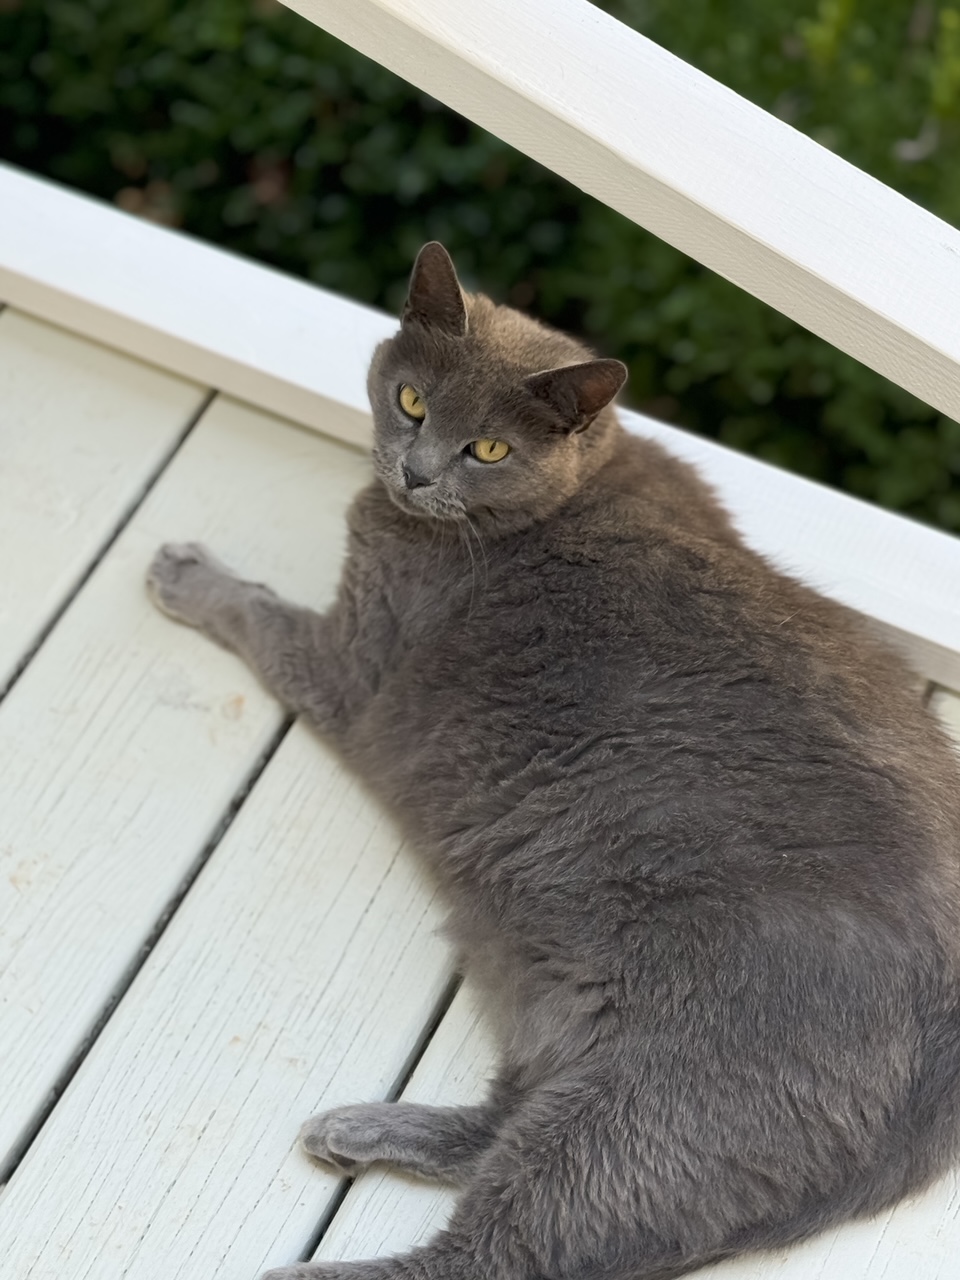
How to build a deck railing that’s as strong as it is pretty to look at. Just ask the cats.
Building a deck railing is one of those DIY projects that might seem a little intimidating ( and quite frankly boring, I know) at first, but trust me, it’s not as tough as it looks. And if you are like me, you want the railing to not only be secure and safe but pretty to look at.
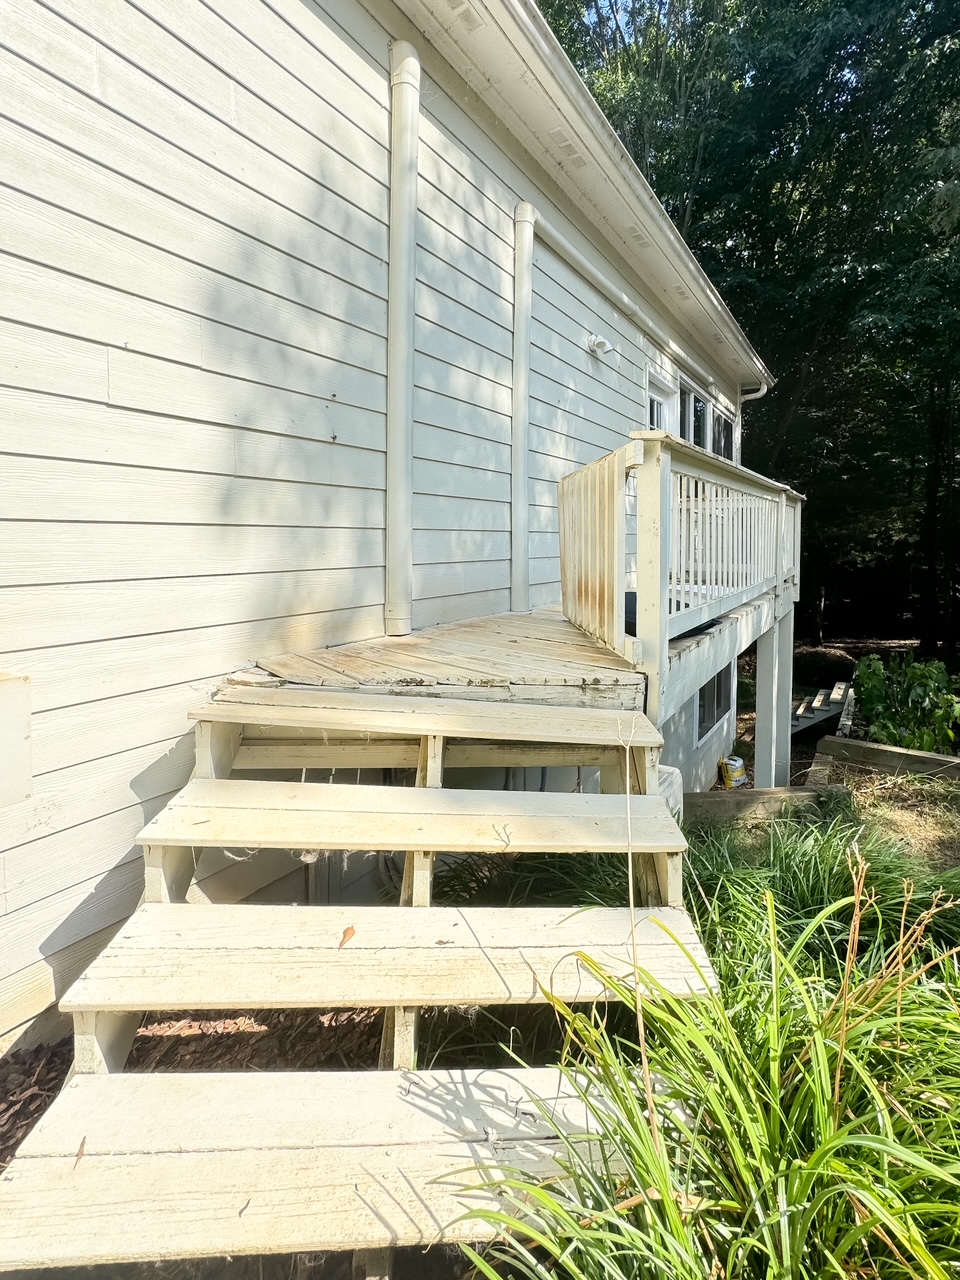
We have a small deck off the family room that we refer to as the ‘Cat Deck’. We call it this because the cats are really the only ones that use it. They eat here and chill out on it. Over the years, the deck has taken a beating and it was time to give it a little refresh. Here’s the before of the eye sore.
Let’s dive into the six steps to construct a deck railing that not only keeps everyone safe, but also adds a touch of charm to your outdoor space.
How to Build a Deck Railing
Step 1: Plan and Measure
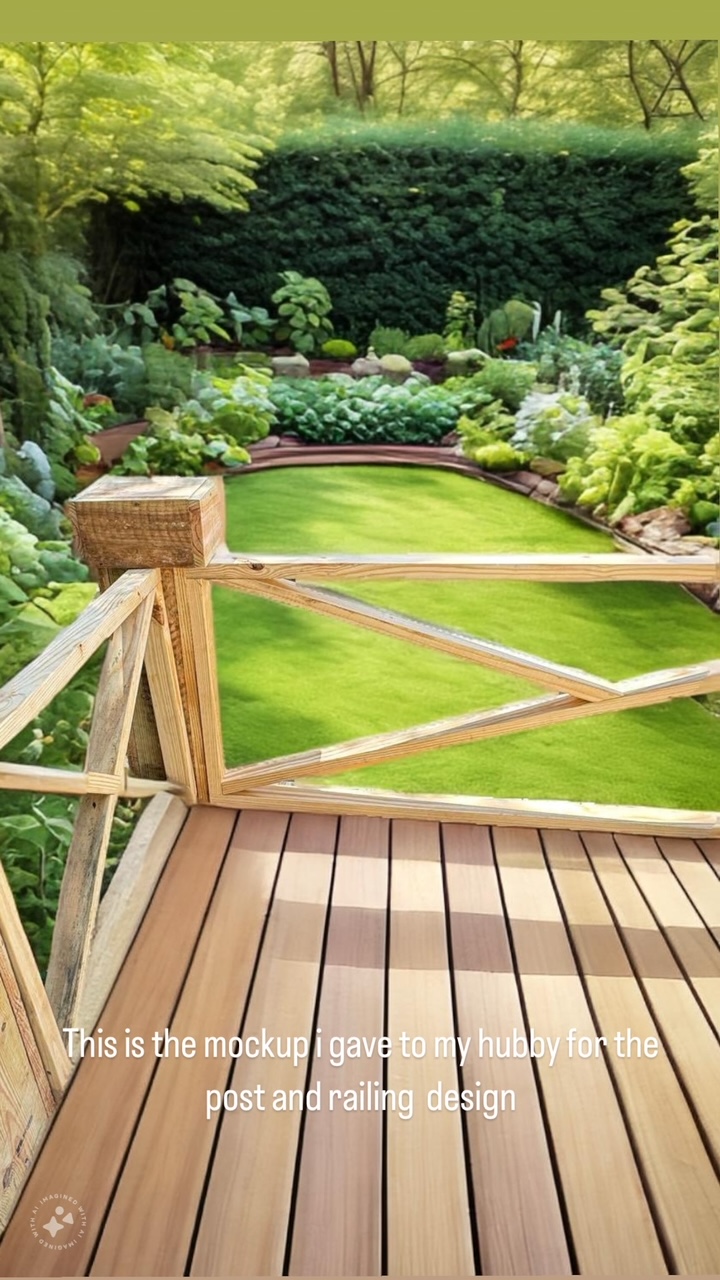
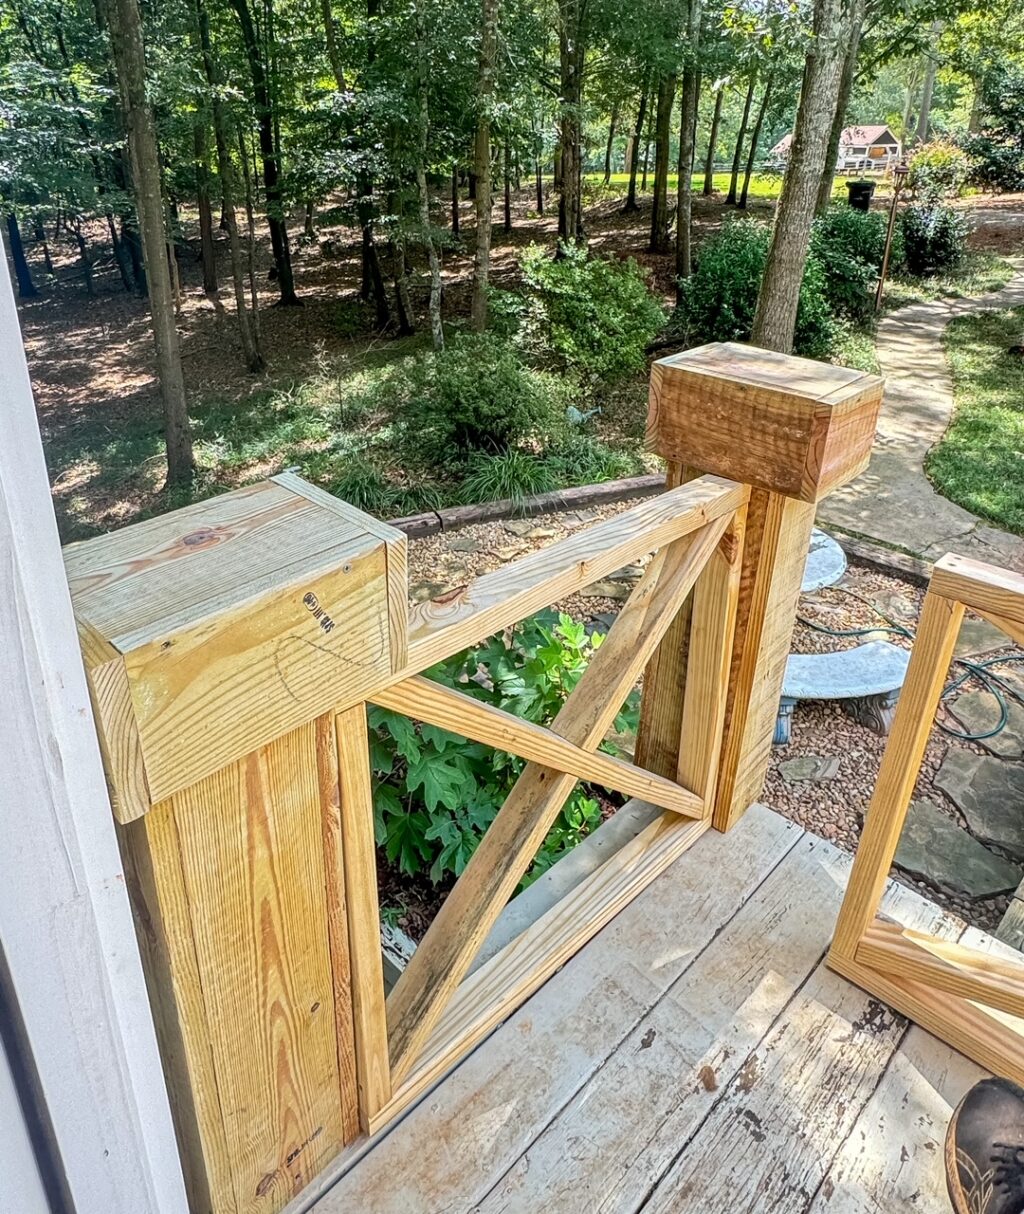
Before you even think about cutting wood, you need a plan. I did a mock up of what I wanted and gave it to my resident carpenter (aka hubby). I wanted chunky posts and x’s. From there, measure your deck to figure out how many posts and corner supports you’ll need. If you are not sure, check local building codes—they’ll tell you how high the railing needs to be and what materials are allowed. Typically, you’ll want your railing posts spaced about 6-8 feet apart.
Step 2: Choose Your Materials
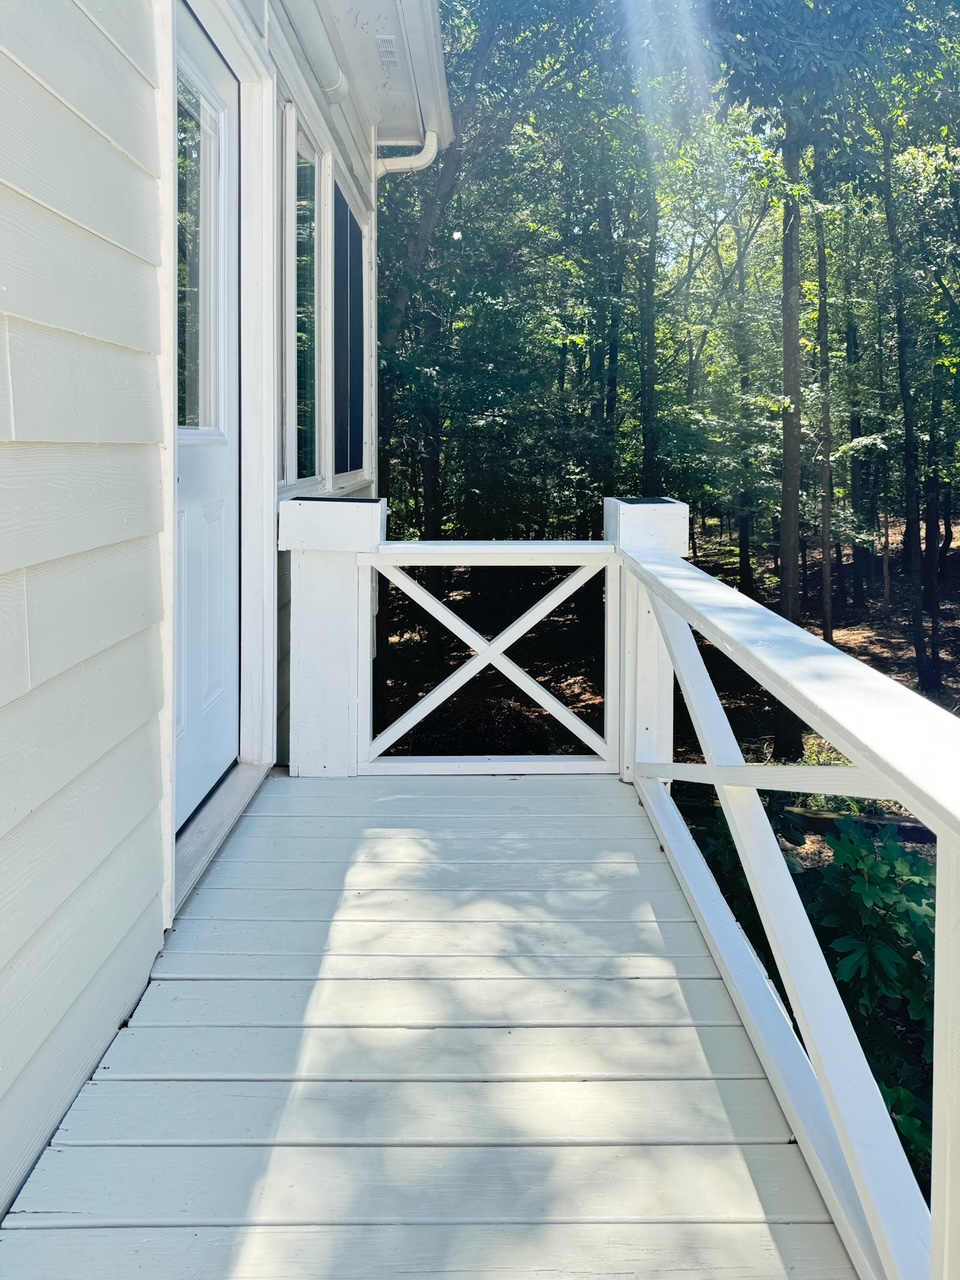
Your deck railing can be made from a variety of materials, but here on the farm, we love the natural look of wood. Cedar or pressure-treated lumber are great choices because they’re durable and resist rot. If you’re after a more modern look, metal balusters or cable rails can give your deck a sleek, updated appearance. For our railing, we used 2×3 treated wood to provide the structure (x’s) and 1×6 for the handrail. We had all of this wood left over from a previous project. The only cost for this project was a gallon of white exterior paint and a gallon of Sedate gray for the deck floor.
Step 3: Install the Posts
The posts are the backbone of your deck railing, so it’s essential to install them securely. Start by cutting your posts to the desired height, including the extra length needed to secure them to the deck framing. Use a level to ensure they’re plumb, and then attach them using lag screws or bolts. For added stability, consider using metal brackets to reinforce the connection between the posts and the deck. For this entire project we used screws vs nails. We find the screws are more secure and have more holding power.
Step 4: Add the Top and Bottom Rails
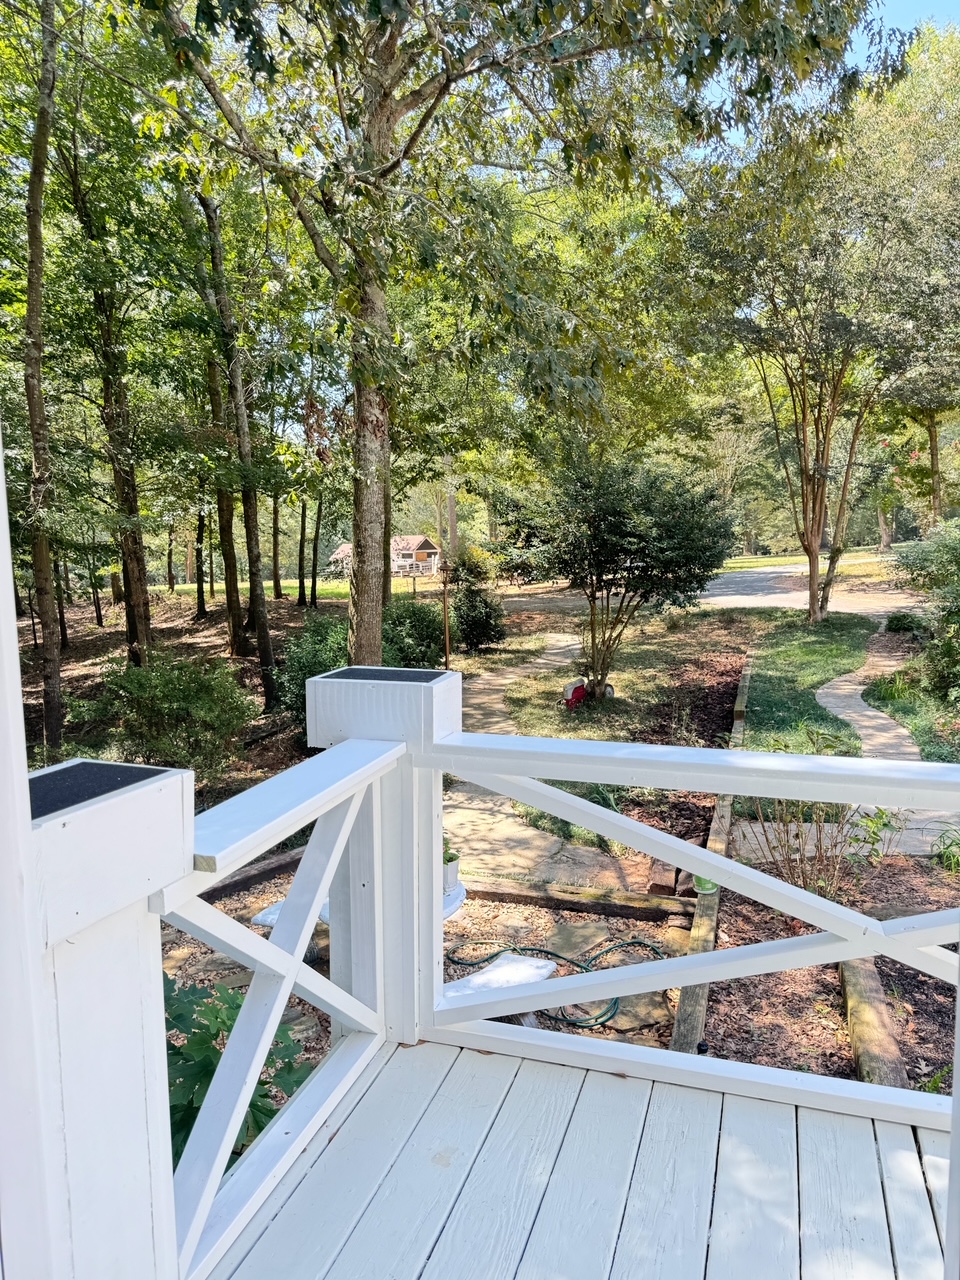
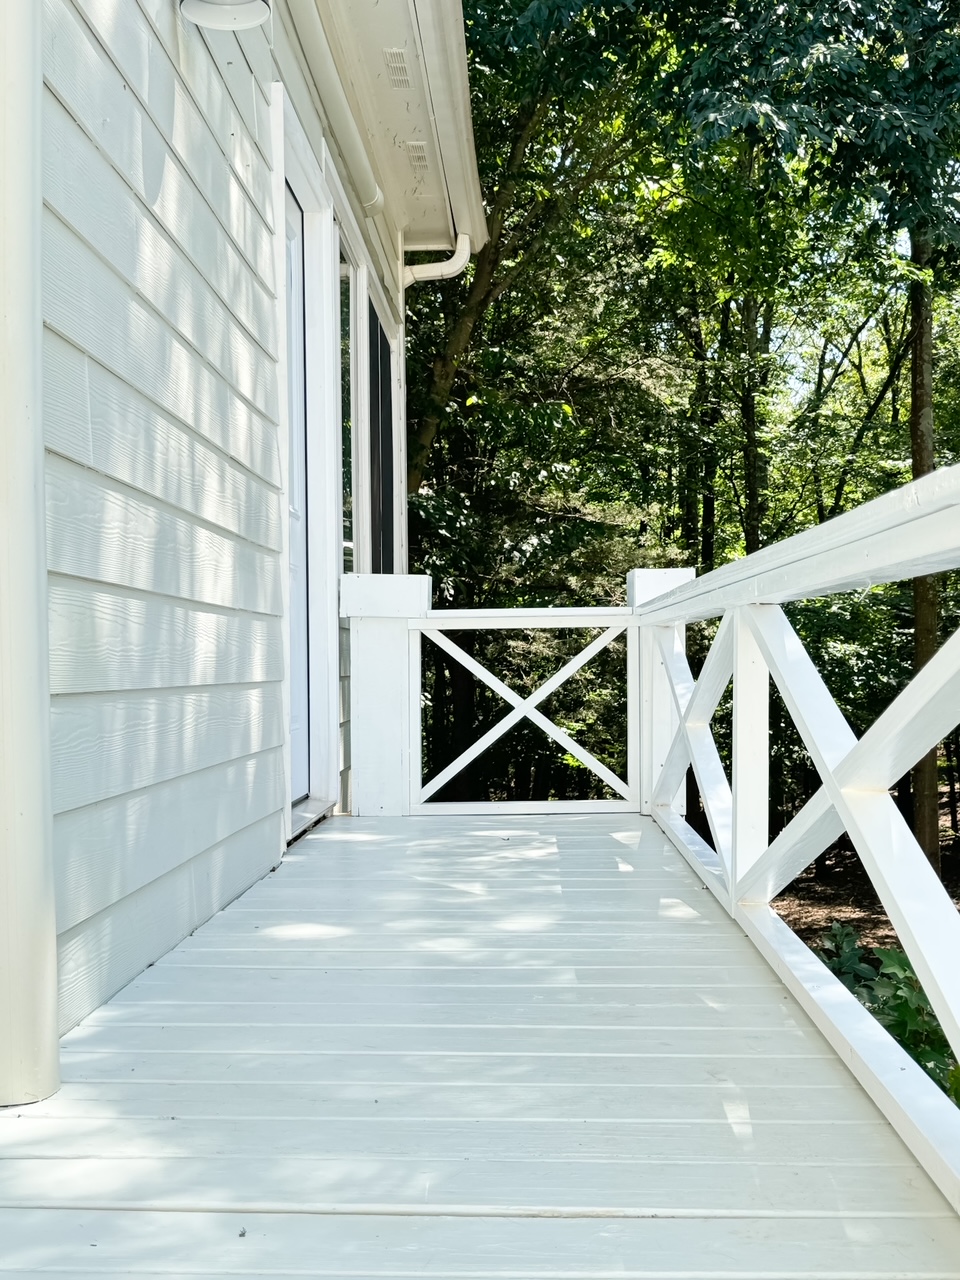
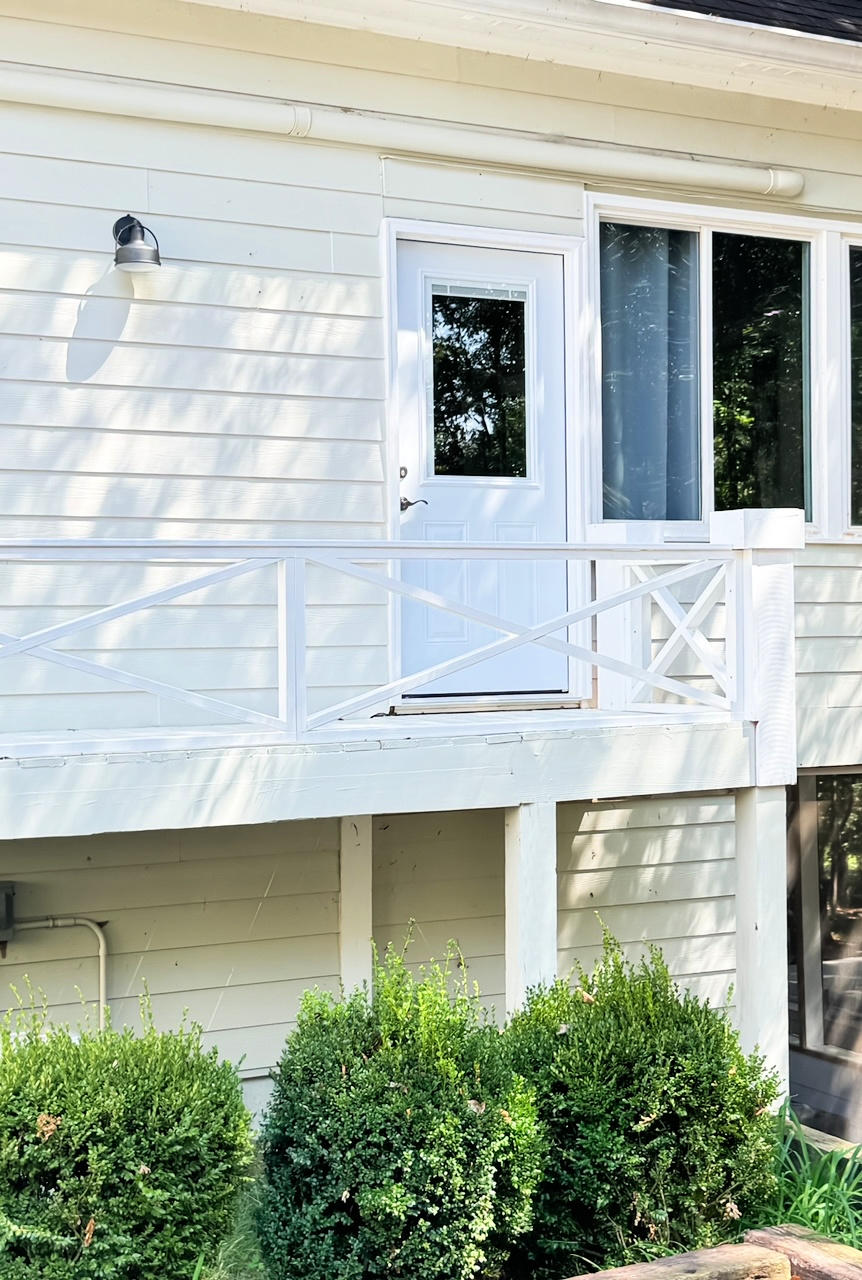
Once your posts are in place, it’s time to add the rails. The bottom rail should sit about 3-4 inches above the deck surface to allow for easy cleaning and prevent water damage. Attach it between the posts, ensuring it’s level. Then, do the same with the top rail. If you’re using wooden rails, pre-drill the holes to prevent the wood from splitting.
Step 5: Install the Balusters or Panels
Balusters (or spindles) are what will fill the space between the top and bottom rails. You can space them evenly or get creative with a pattern, like I did. If you’re using panels, like a metal or glass system, now’s the time to put them in place. Secure each baluster or panel according to the manufacturer’s instructions, making sure everything is level and sturdy.
Step 6: Add Finishing Touches
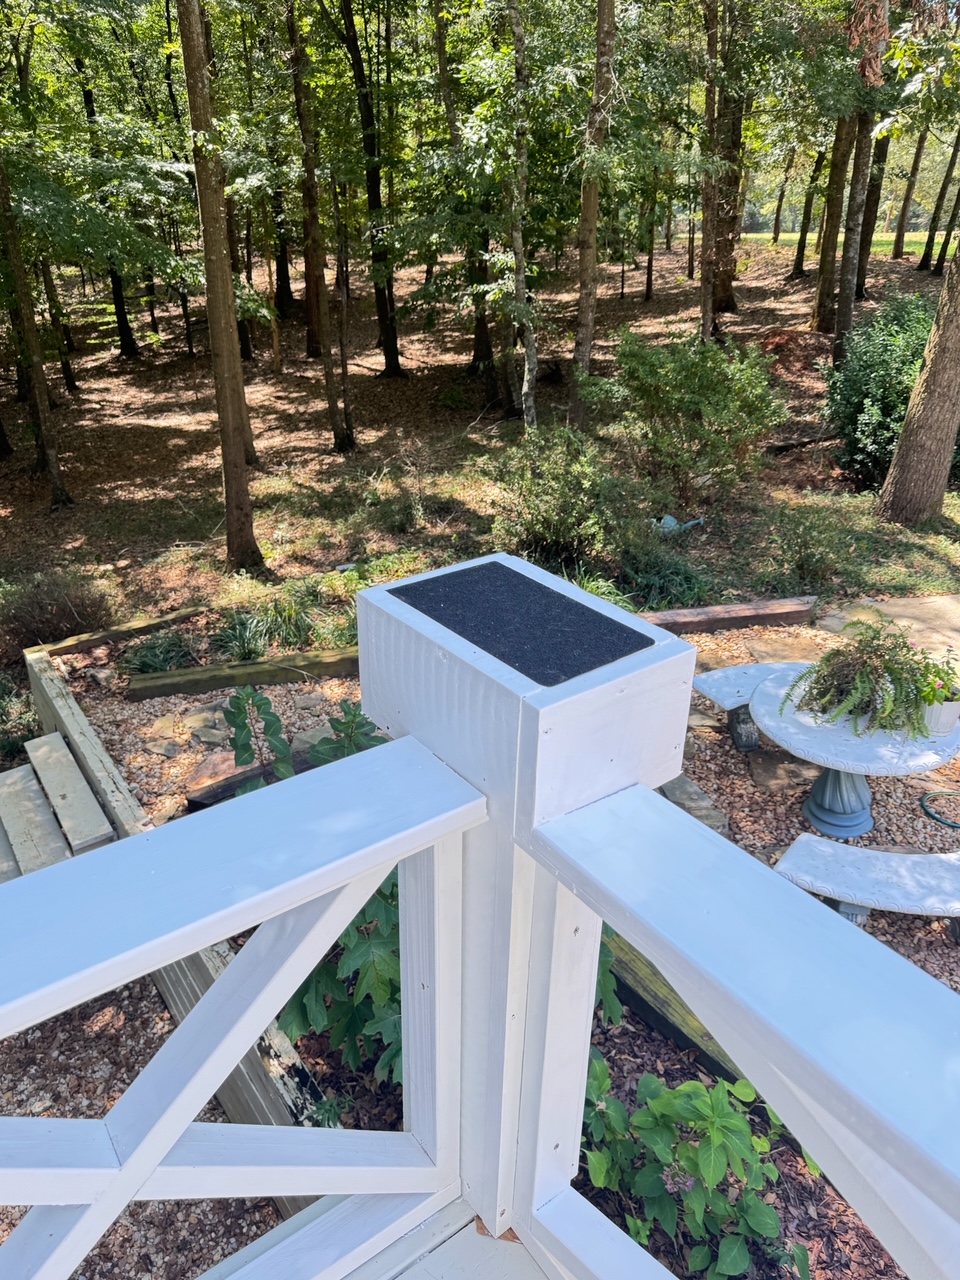
Now that most of the work is done, it’s time to add those little details that make your deck railing stand out. I painted the posts and railing in an exterior semi gloss white. I also cleaned the deck floor and gave it two coats of exterior paint (Sedate Gray) in a satin finish. To minimize any cat slippage and dirt, I applied outdoor stair thread non slip tape to each post. You could also cap your posts with decorative post caps or lights.
Building a deck railing doesn’t have to be a daunting task. With a bit of planning, the right materials, and a touch of creativity, you can create a railing that’s as sturdy as it is beautiful…..and cat approved.
Additional outdoor projects that may be helpful:
How to build an outdoor duck pond

This post may contain affiliate links for products that Duke Manor Farm uses, suggests or recommends to its readers.

Love your new Cat deck.
Nice! How many cats? Miss that place.
“Cat slippage”…I love that! With both dogs and cats here, cat slippage is real. Great idea!