Easy Fall Wreath in 4 steps
Create a beautiful easy Fall wreath in 4 steps using a grapevine wreath, faux floral bunches, and ribbon. A lovely way to greet your guests at the door this fall season.

Although I don’t do a ton of seasonal crafts these days, I do love creating pretty wreaths. Putting a wreath up is generally the first thing that I do when decorating for a new season. Over the years I have learned a few tricks when making wreaths and ways to save money on the materials.
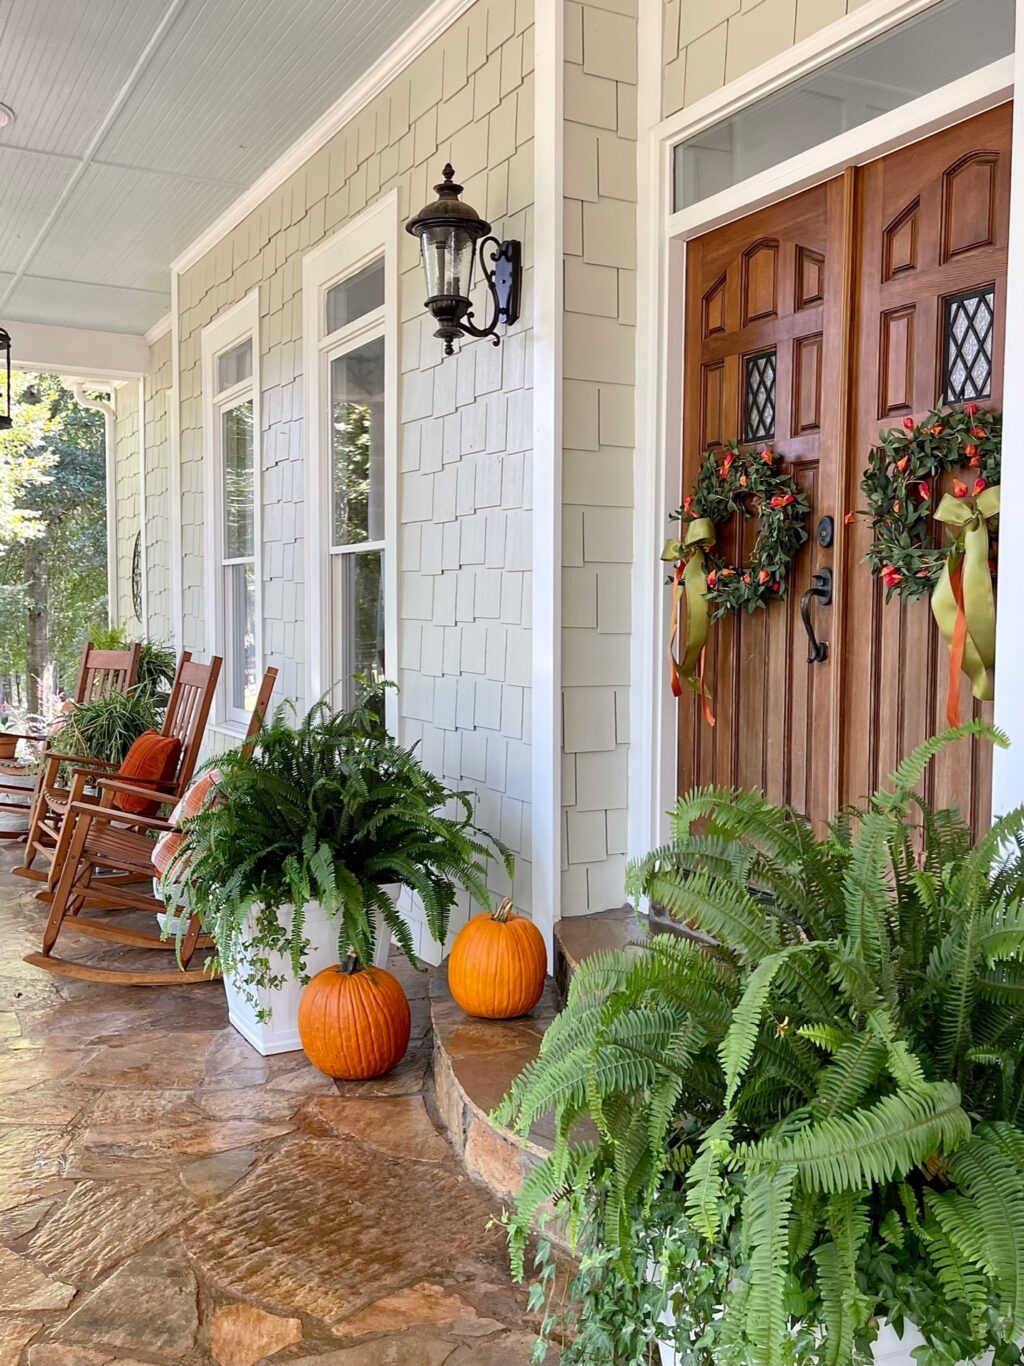
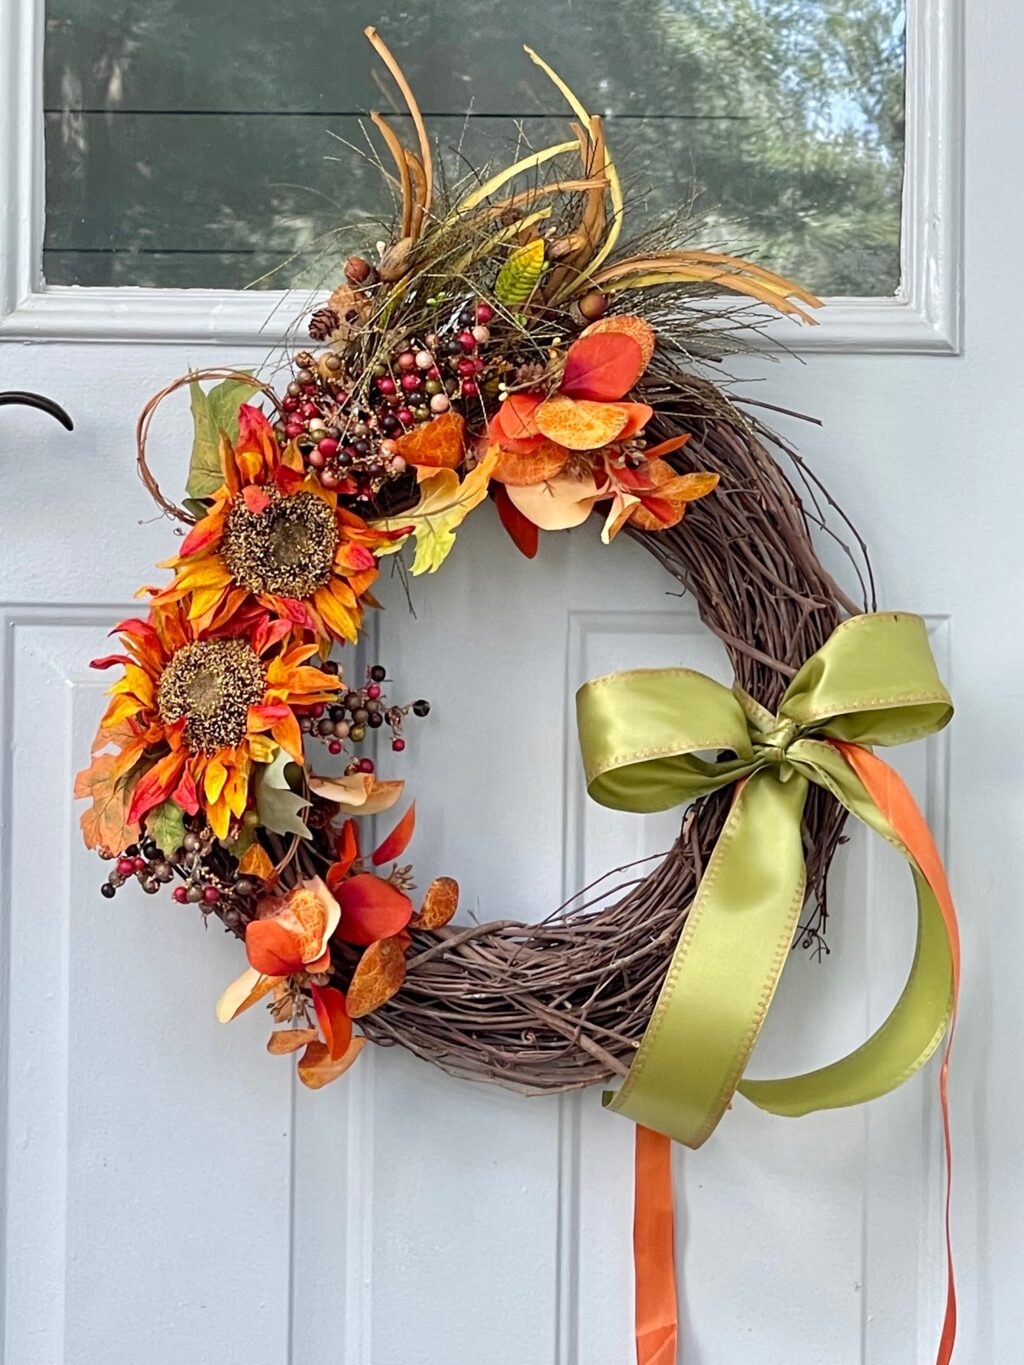
Although I am using the same wreaths on the front doors as I did last year, I was itching to create something new for a large grapevine wreath that hangs on the side of the garage.
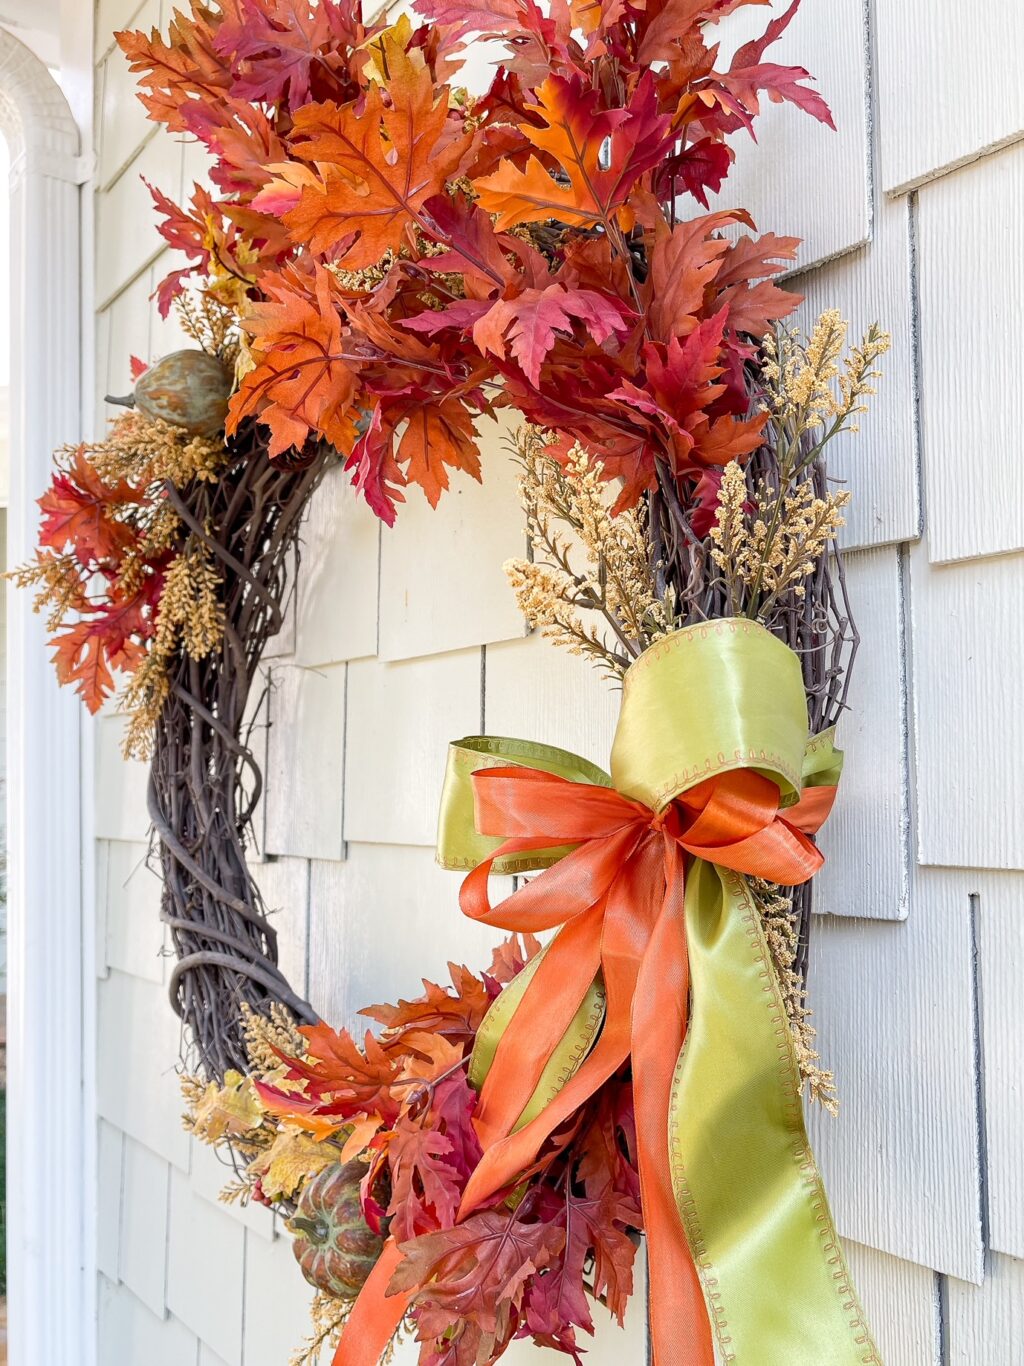
For the breezeway entrance, I used a combination of materials that I have used in previous wreaths like this wreath from 2014 and 2015. I am so glad I didn’t purge the floral picks.
Easy Fall Wreath Instructions
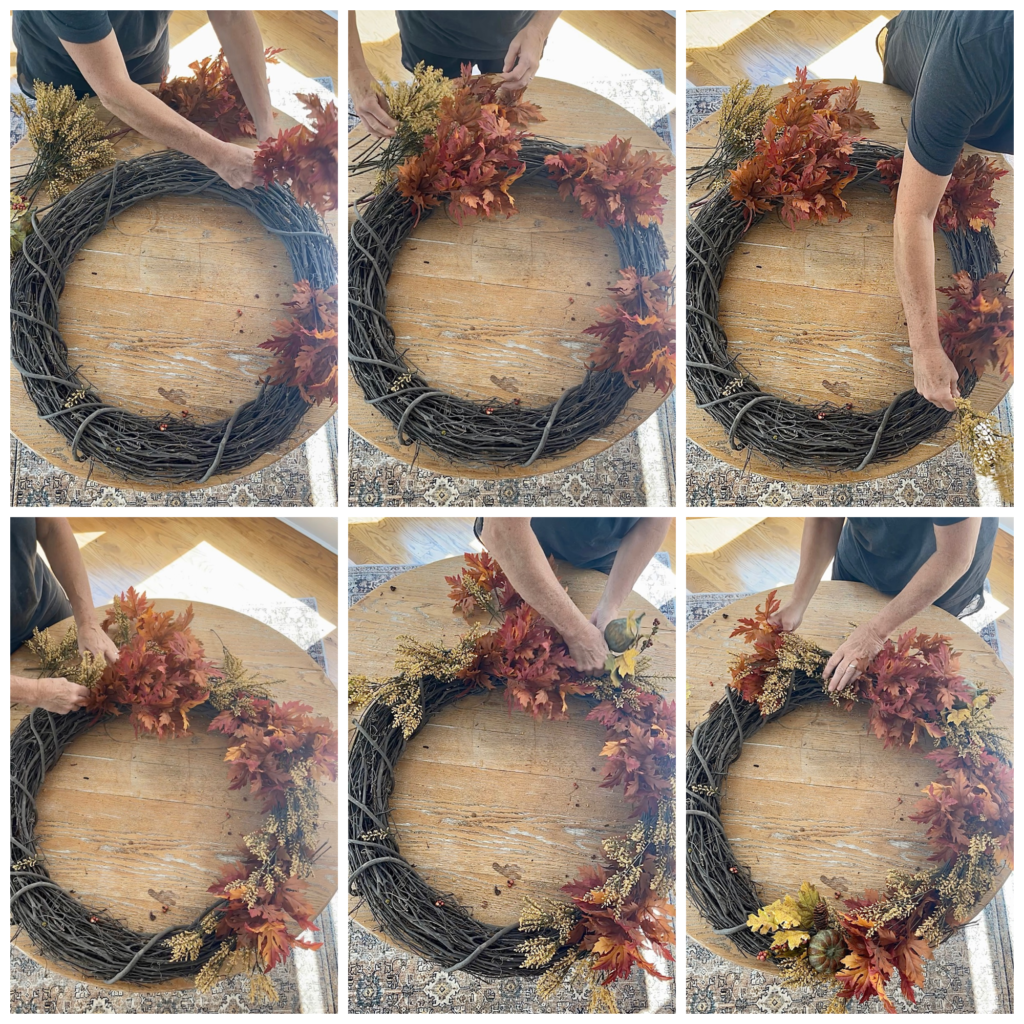
One of the tricks I have learned over the years is not to use any glue to secure your wreath embellishments. I only use floral wire if necessary and only because it’s more work to assemble and disassemble. I didn’t use any glue or wire for this fall wreath.
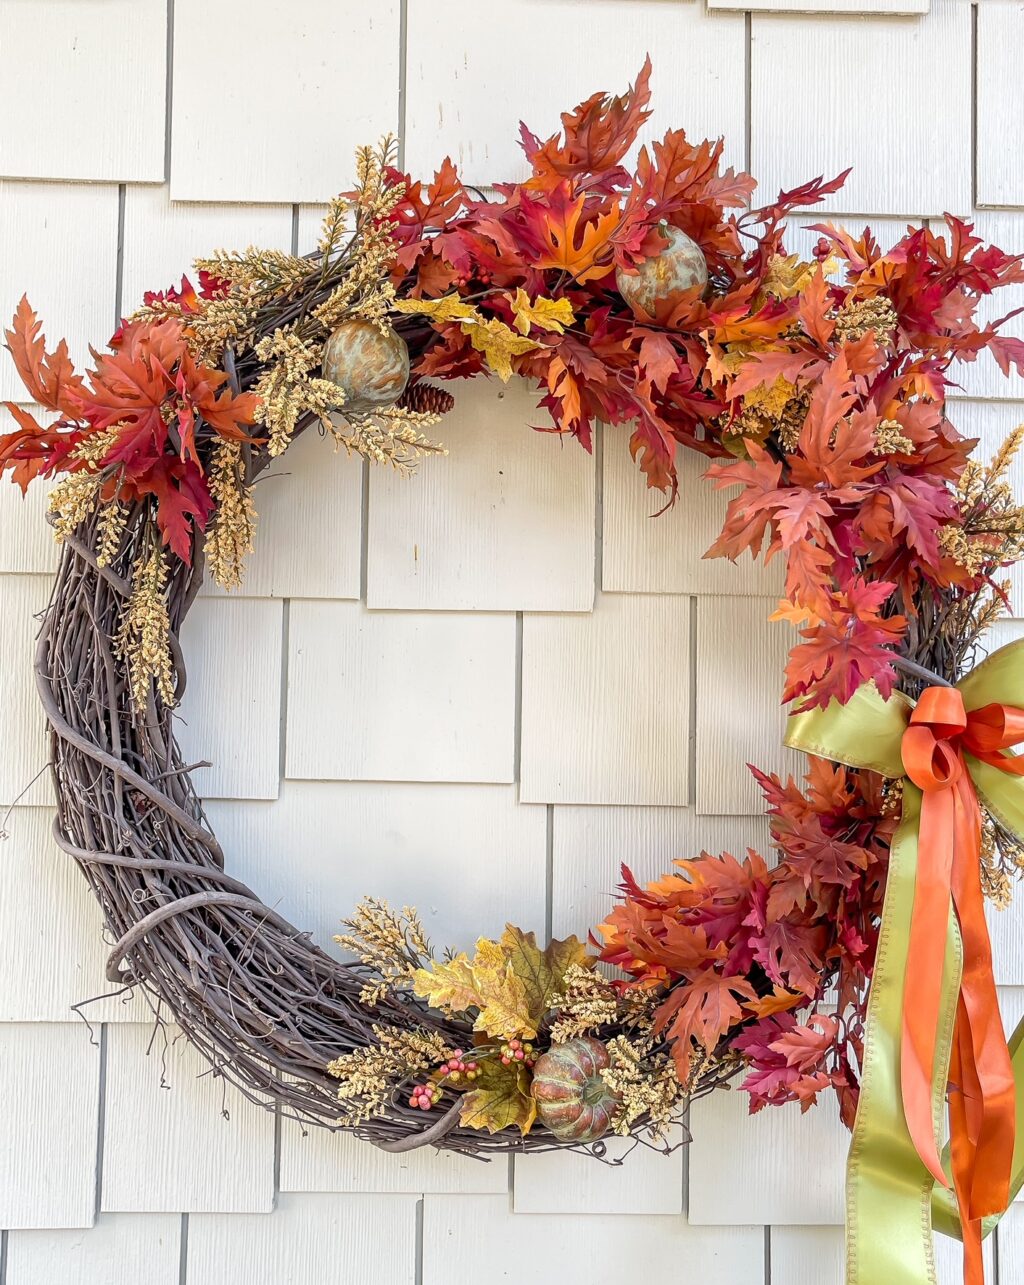
How to make this wreath
- I took my biggest floral stems (the orange leaves), divided and began placing them around my grapevine wreath. I simply inserted them into the wreath, positioning them within the wreath circle so that they would not stick out.
- Next, I took my smaller floral (the yellow stems) and repeated the same step filling gaps and creating fullness around the wreath.
- My third addition was some small pumpkin picks to give the wreath more dimension, color and interest. I placed these around the wreath in the same place creating a pattern.
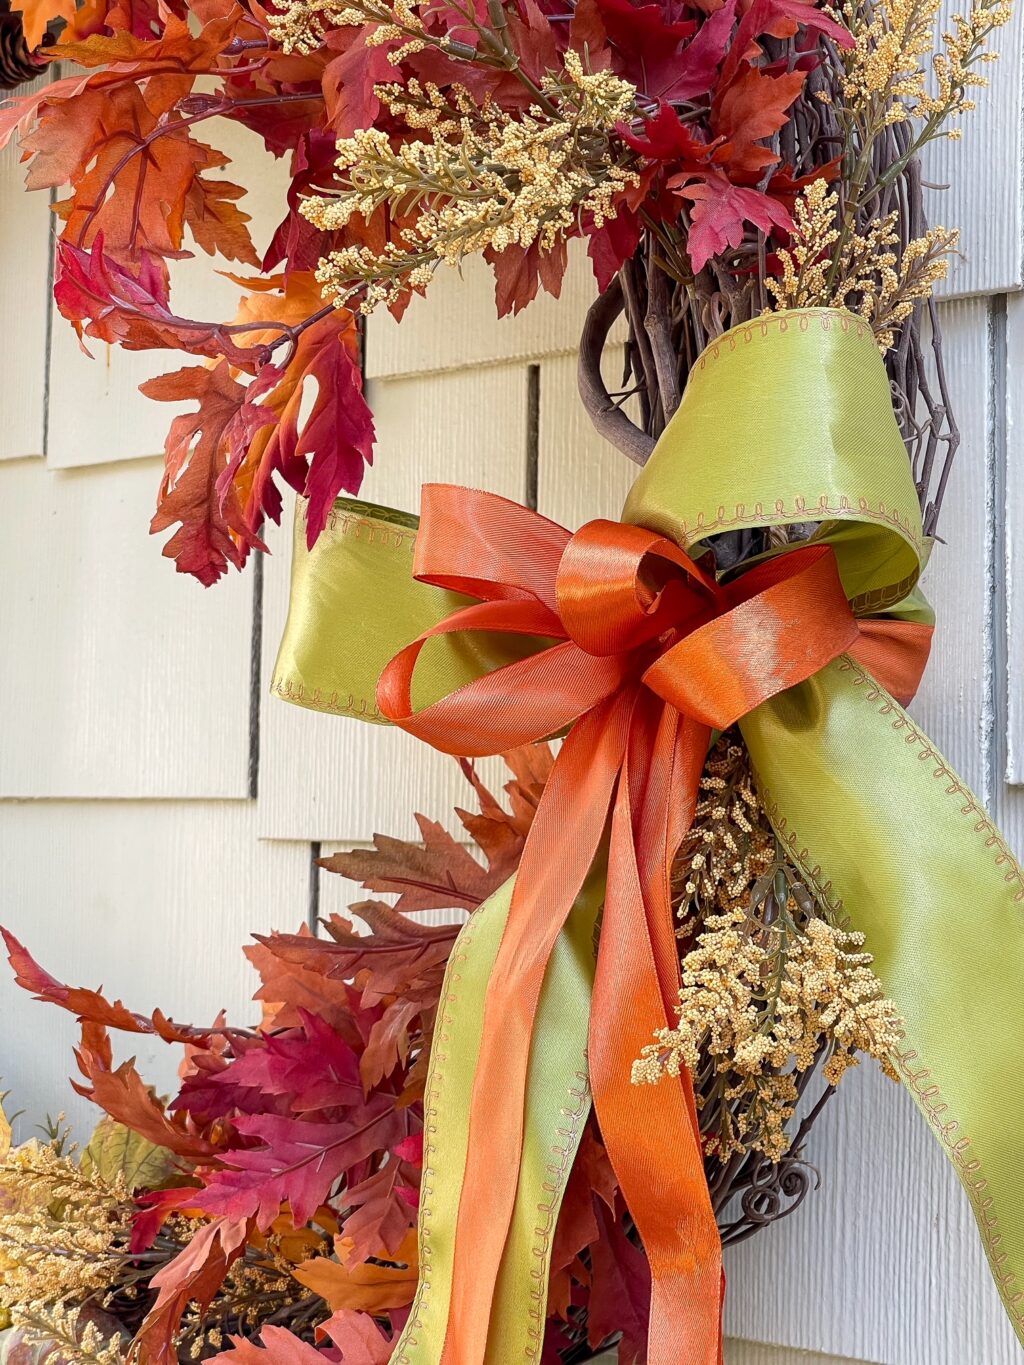
- The final step was to add a bow using green and rust ribbon. The green was in my stash and I used the rust ribbon on my Christmas tree last year. I am not great at pretty bows so I made a simple bow with the green ribbon and another with the rust. I have pillows on the porch with the same colors so they coordinated nicely.
I hope these tips will inspire you to make your own fall wreath this season.
Want more fall wreath inspiration? I got you.
A Tip to make your fall wreath look bigger
Shop items for this wreath